Domains
What is a Domain?
Well, the answer to that question is two-fold.
Here's the ChatGPT version of what a domain is
As far as Patr is concerned, however, a domain is just one of those things you buy from registrars like GoDaddy, Namecheap, or Google Domains. Any domain you purchase from a domain registrar, (like our beloved example.com) is considered a domain. We support almost all TLDs out there (like .com, .net and .cloud of course, among the other hundreds).
In order to create a Managed URL or a Custom Domain to a Deployment or a Static Site, you need to first add a Domain to Patr.
Adding a Domain
In order to add a domain to Patr, first navigate to the Domains section.

In the Domains section, click on the Add Domain button.

In the "Add Domain" screen, enter your domain (example.com) in the Domain Name field.
Do not use a subdomain like hello.example.com. Enter the root domain, such as example.com instead. The subdomain can be used while creating a Managed URL.
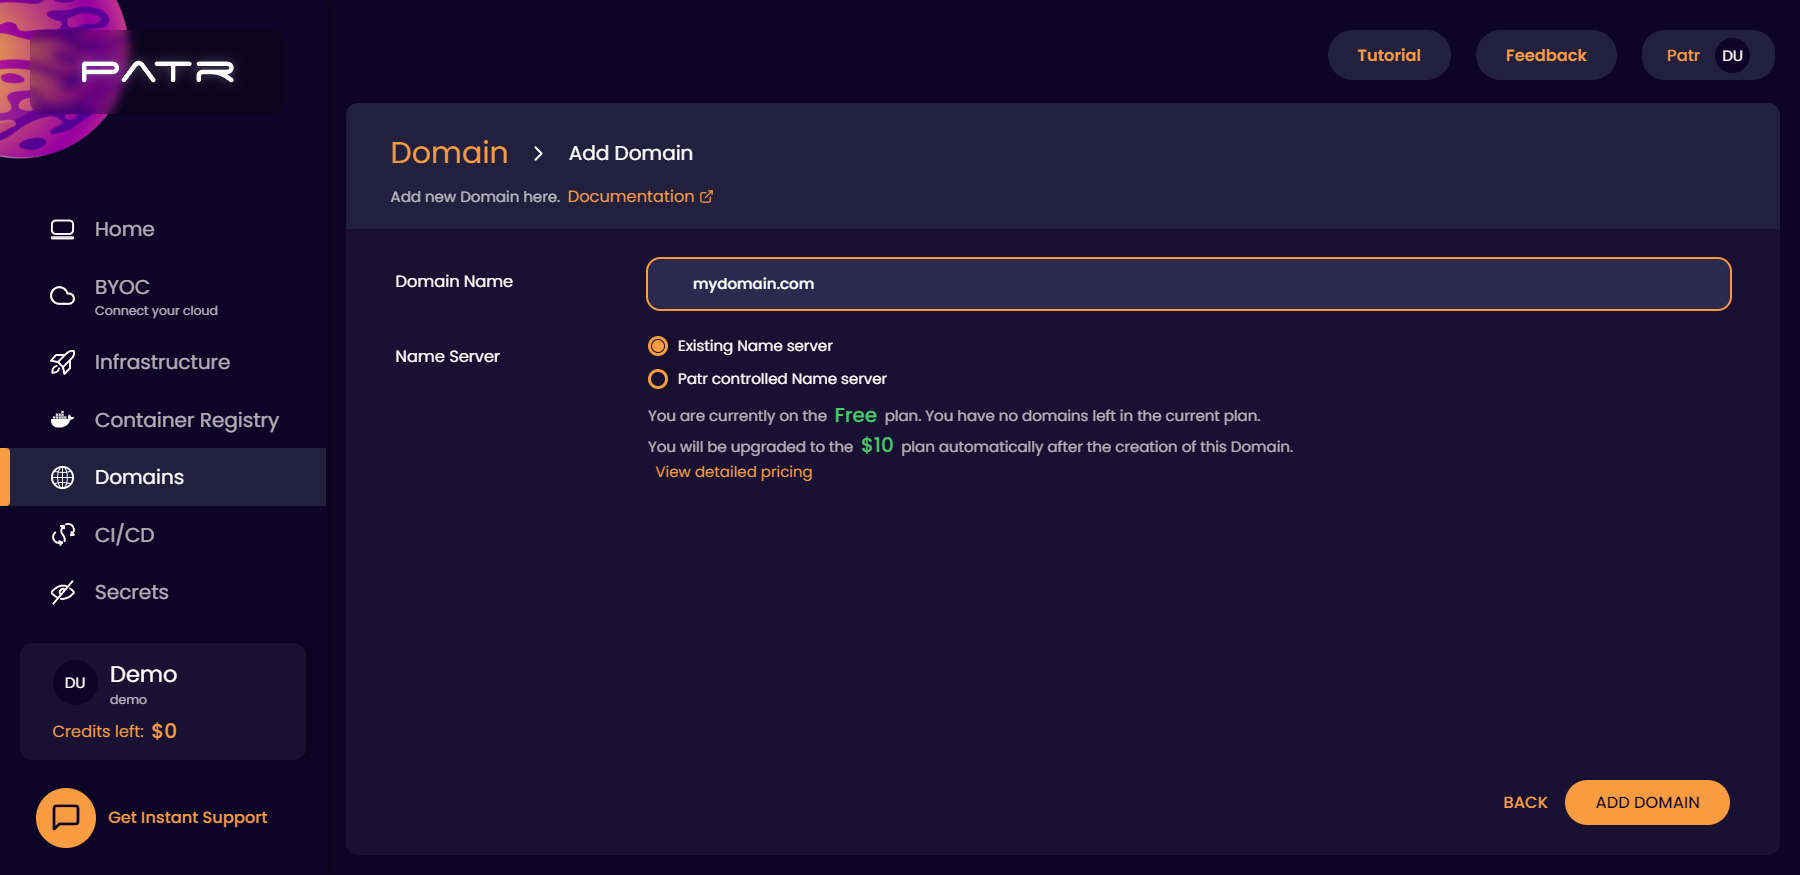
Choosing a nameserver
While adding a domain, you have two options:
- Use Patr nameservers
- Keep your existing nameservers
What is a nameserver?
Again, this is what ChatGPT has to say about Nameservers
A nameserver is a specialized server that is responsible for translating domain names into IP addresses. When a user enters a domain name in their web browser, the browser sends a request to a nameserver to look up the IP address associated with that domain name. The nameserver then responds with the IP address, allowing the browser to establish a connection with the web server hosting the website or web application. Nameservers play a critical role in the functioning of the Domain Name System (DNS), which is a hierarchical decentralized naming system for computers, services, or other resources connected to the internet or a private network. The DNS uses a distributed database to store information about domain names and their associated IP addresses, and nameservers act as the primary interface between users and the DNS. Each domain name must have at least two nameservers associated with it, which are responsible for resolving queries related to that domain name. These nameservers can be operated by the domain owner, a hosting provider, or a third-party DNS provider. When adding a domain to PATR, you have the option to use existing domain registrar'stheir nameservers or transfer the domain and manage the nameservers directly.In simple terms, a nameserver controls your DNS. If you want to create a DNS record, your nameserver will create one for you. In most cases, your domain registrar will provide one for you.
Here are the differences between Patr nameservers and the default nameservers from your registrar:
- If your nameservers are on Patr, when you create a Managed URL, Patr can automatically create a DNS record for you, making sure that your DNS records are always up to date, regardless of the region(s) your Deployments are running on.
- Patr automatically scales your nameservers globally to make sure it is always highly available to all users, regardless of their region.
- Patr's nameservers also makes sure your applications respond faster by prioritising servers that provide IPv6 and HTTP/2 and HTTP/3.
- Patr's nameservers provide advanced features like CNAME flattening to make sure you can add any DNS record, even at the root level, with the highest performance.
If you're unsure what to choose, select Patr nameservers, and Patr will manage the rest for you.
Once added, click on the Add Domain button and your domain will get added.
Verifying your Domain
Once your domain is added, it needs to be verified before it can be used within Patr.
Verifying a Domain with existing NameServers
In order to verify a domain that uses existing nameservers, you will need to add a DNS record that validates your domain name. In your domain list, click on your domain.
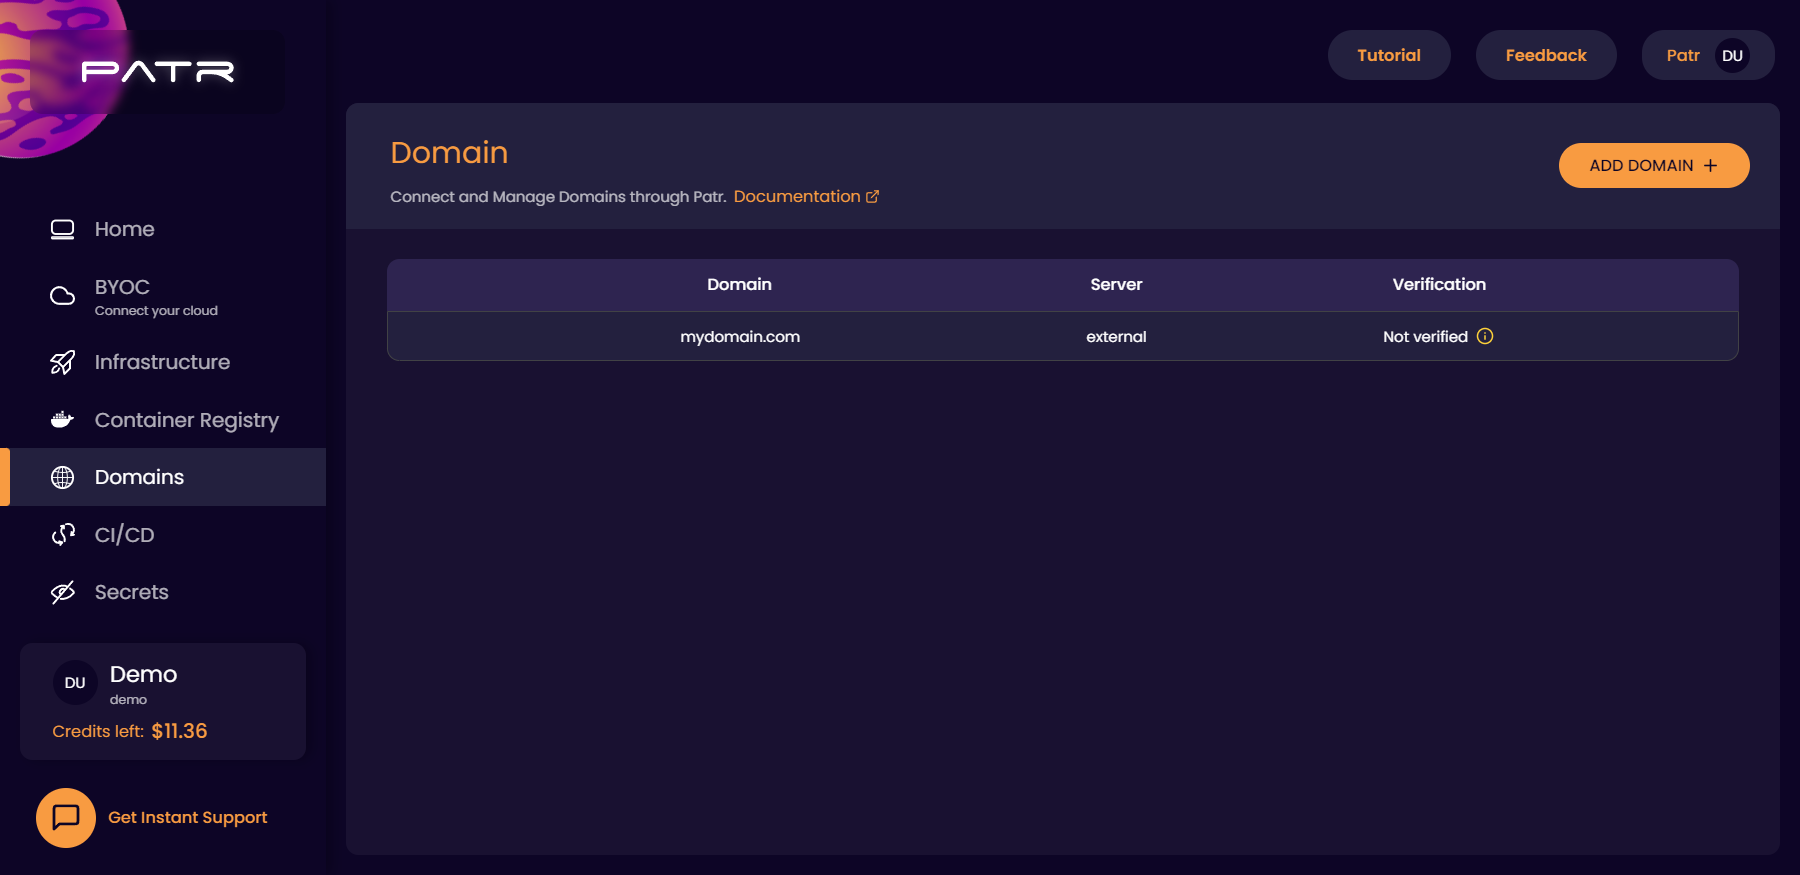
In the top right corner, click on the Verify? button.

In the next screen, you'll get a verification value to create a DNS record for.
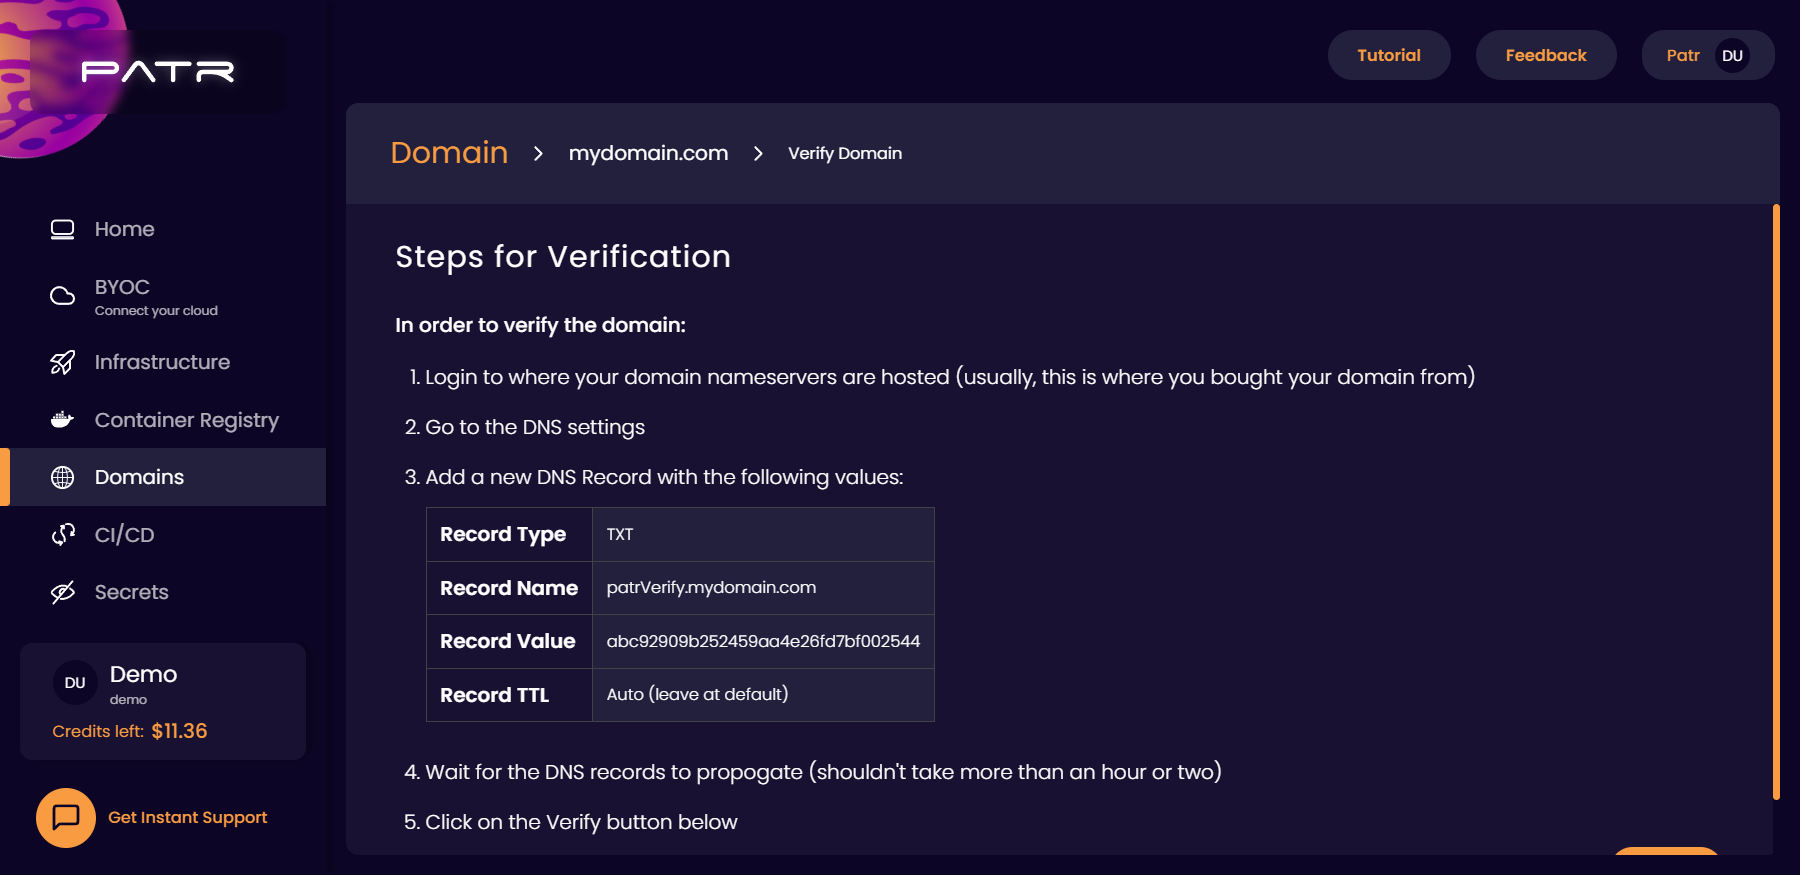
Login to your domain registrar, and add the following DNS record:
| Record Type | Record Name | Record Value | TTL |
|---|---|---|---|
TXT |
patrVerify |
<your verification value> | Auto (leave at default) |
Once the DNS record is added, wait for the DNS record to propogate to all nameservers. This usually shouldn't take more than an hour or two. Once your DNS record is propogated, your domain will automatically be verified. You can also click on the Verify button on Patr to manually verify your domain.
For examples on how to add a DNS record for popular registrars, you can follow these guides:
- GoDaddy - Verifying your Domain with existing nameservers
- NameCheap - Verifying your Domain with existing nameservers
- Google Domains - Verifying your Domain with existing nameservers
Transferring a Domain to Patr nameservers
Note: As soon as your domain is verified, Patr's DNS records will become active. In order to prevent any downtime, it is strongly recommended to add any DNS records you currently have on your registrar to Patr as well, before starting the verification process. You can find instructions for adding DNS records on Patr below.
In order to verify a domain that uses Patr nameservers, you'll need to add Patr's nameservers in your domains registrar:
- Login to your domain registrar (this is where you bought the domain from).
- Select your domain
- Choose the Nameservers section.
- In the Nameservers section, choose "Custom Nameservers"
- Add the following two nameservers:
ns1.patr.cloudns2.patr.cloud
Once added, click on save, and wait for the nameserver change to propogate. This usually happens pretty quickly. Once your DNS record is propogated, your domain will automatically be verified. You can also click on the Verify button on Patr to manually verify your domain.
For examples on how to update nameservers for popular registrars, you can follow these guides:
- GoDaddy - Transferring your Domain to Patr nameservers
- NameCheap - Transferring your Domain to Patr nameservers
- Google Domains - Transferring your Domain to Patr nameservers
Adding DNS records
Once you've chosen Patr nameservers for your domain, you'll have the option to add your DNS Records rightaway.
What are DNS Records?
DNS records are the mappings for which domain points to what IP address. In order to add a DNS record on Patr, follow these steps:
- Navigate to the Domains section in the side-nav
- Select your domain

- Now click on the Add DNS Record button

- Fill in the following fields:
- Type: Here you can specify the type of DNS Record you would like to create. The most commonly used types of DNS records include:
Arecord: Also known as address record,Arecords map a domain name to an IPv4 address.AAAArecord: Also known as quad-Arecord,AAAArecords map a domain name to an IPv6 address.TXTrecord:TXTrecords are used to provide additional information about a domain, such asSPFrecords for email authentication, etc.MXrecords:MXrecords specify the mail exchange servers that are responsible for accepting incoming email messages for a domain.CNAMErecords:CNAMErecords are used to alias one domain name to another. For example, aCNAMErecord could be used to pointwww.example.comtoexample.com.- Name: Add your subdomain out here or use
@for the root domain. For example if your site's URL isblog.example.com, addblogin the Name field. If it's onlyexample.com, leave the Name field with the default value@. - Target: Fill this field with whatever your DNS Record is pointing to. In case of an
Arecord, you can enter the IPv4 address, for example. - TTL: TTL, or time to live, is a value included in DNS records that specifies how long a client should cache the record before requesting a fresh copy from the authoritative nameserver. This helps to reduce the load on the nameserver and improve performance by allowing resolvers to cache DNS records for a period of time. Unless you need a specific TTL, you can leave this at
auto. - Proxied: This determines if your DNS record should be proxied by Patr's firewall or not.
- Once you're done adding all values, click on
Save.

Deleting a Domain
This is a destructive action and will result in a loss of all DNS records. Please think twice before doing this.
If you're sure you want to delete your domain, you can click on the Delete button in a domain, and a confirmation will be shown to you. Enter the name of the domain and the domain will be deleted.