Setting up custom domains for your Infrastructure
How to setup custom domains for your Deployment
Prerequisites: What you'll need
- A Patr account (You can sign up for one here)
- A Domain added on Patr and verified
- A Deployment created and running on Patr
Creating a Managed URL for a Deployment
In order to create a Managed URL, navigate to Infrastructure in the side navigation, and click on Managed URLs.
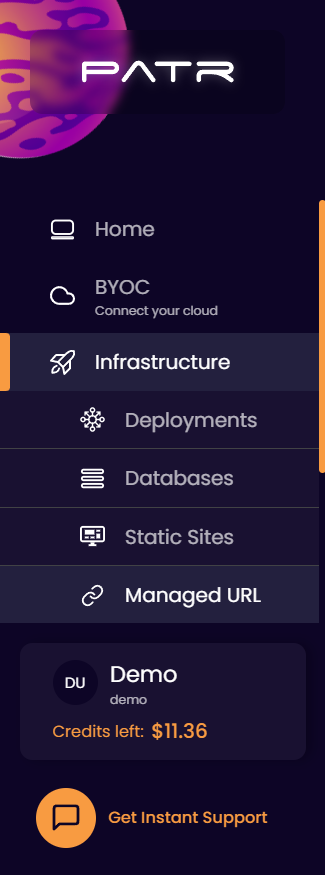
On the Managed URLs screen, click on the Create Managed URL button.

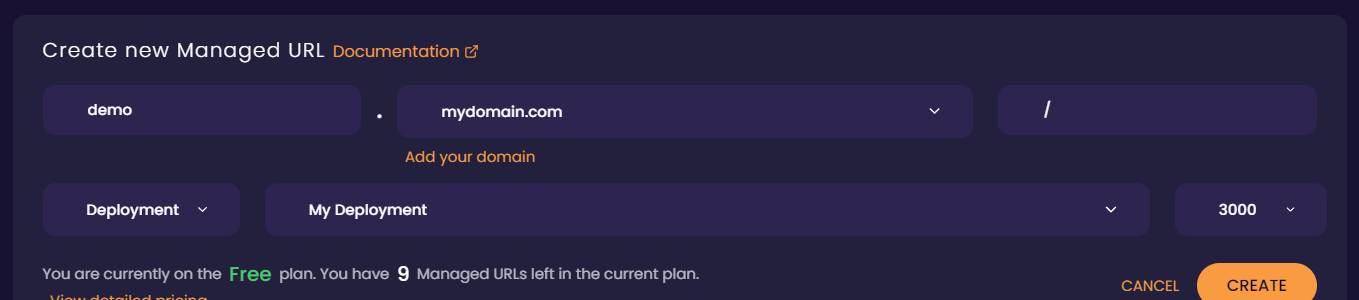
In the create Managed URL section, enter the following values:
- Subdomain: The subdomain of the Managed URL you want to create. For example, if you want your Managed URL to run on
https://app.example.comwhich points to a Deployment (say,Backend), enterappas the subdomain. If you want your Managed URL to trigger forhttps://example.com(the root domain), then enter@as the subdomain. - Domain: A verified domain that has been added to your account. You can learn more on adding a Domain to Patr here. In the case of
https://app.example.com, chooseexample.comas your domain. - Path: The sub-path to which this Managed URL will respond to. If you want your Managed URL to serve on the default path, you can simply use
/as the default value. - Type: Select the Type as
Deployment, and choose the Deployment you want it to point to. In our example, this would beBackend. You can then choose the port of the application you want to point the Managed URL to. Patr will automatically send any requests sent to the Managed URL to the Deployment on the chosen port.
If your Managed URL has a path as /api pointing to a Deployment, for example, any requests that begin with /api will trigger the Managed URL, and will subsequently be forwarded to the Deployment along with the full path (including the /api).
You can now proceed to Configuring your Managed URL
How to setup custom domains for your Static Site
Prerequisites: What you'll need
- A Patr account (You can sign up for one here)
- A Domain added on Patr and verified
- A Static Site running on Patr
Creating a Managed URL for a Static Site
In order to create a Managed URL, navigate to Infrastructure in the side navigation, and click on Managed URLs.
On the Managed URLs screen, click on the Create Managed URL button.
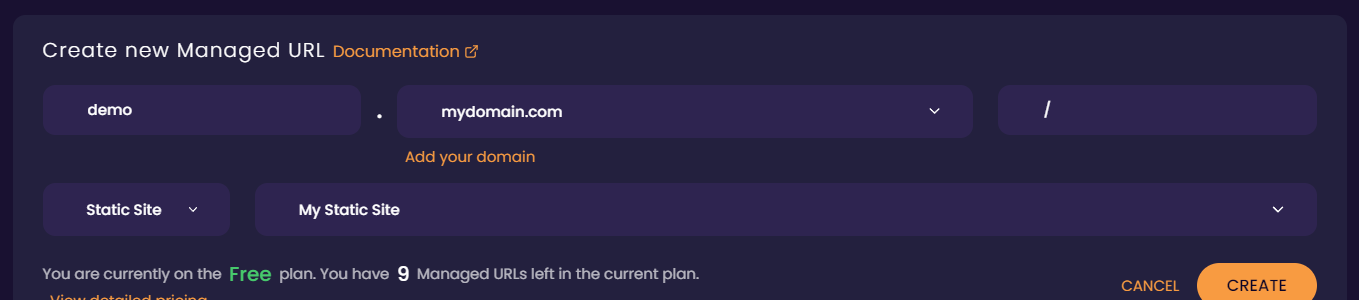
In the create Managed URL section, enter the following values:
- Subdomain: The subdomain of the Managed URL you want to create. For example, if you want your Managed URL to run on
https://app.example.comwhich points to a Static Site (say,Frontend), enterappas the subdomain. If you want your Managed URL to trigger forhttps://example.com(the root domain), then enter@as the subdomain. - Domain: A verified domain that has been added to your account. You can learn more on adding a Domain to Patr here. In the case of
https://app.example.com, chooseexample.comas your domain. - Path: The sub-path to which this Managed URL will respond to. If you want your Managed URL to serve on the default path, you can simply use
/as the default value. - Type: Select the Type as
Static Site, and choose the Static Site you want it to point to. In our example, this would beFrontend. Any requests that are then sent to the Managed URL will then be forwarded to your Static Site.
If your Managed URL has a path as /site pointing to a Static Site, for example, any requests that begin with /site will trigger the Managed URL, and will subsequently serve the Static Site, but from the ./site folder within the Static Site.
You can now proceed to Configuring your Managed URL
Configuring your Managed URL - Pointing your DNS
Once a Managed URL is created, Patr will respond to the Managed URL whenever a request is sent to it. However, in order for Patr to receive requests sent to it, the DNS needs to be pointing to the Managed URL.
Pointing your DNS depends on if your domain's nameservers are hosted by Patr or externally.
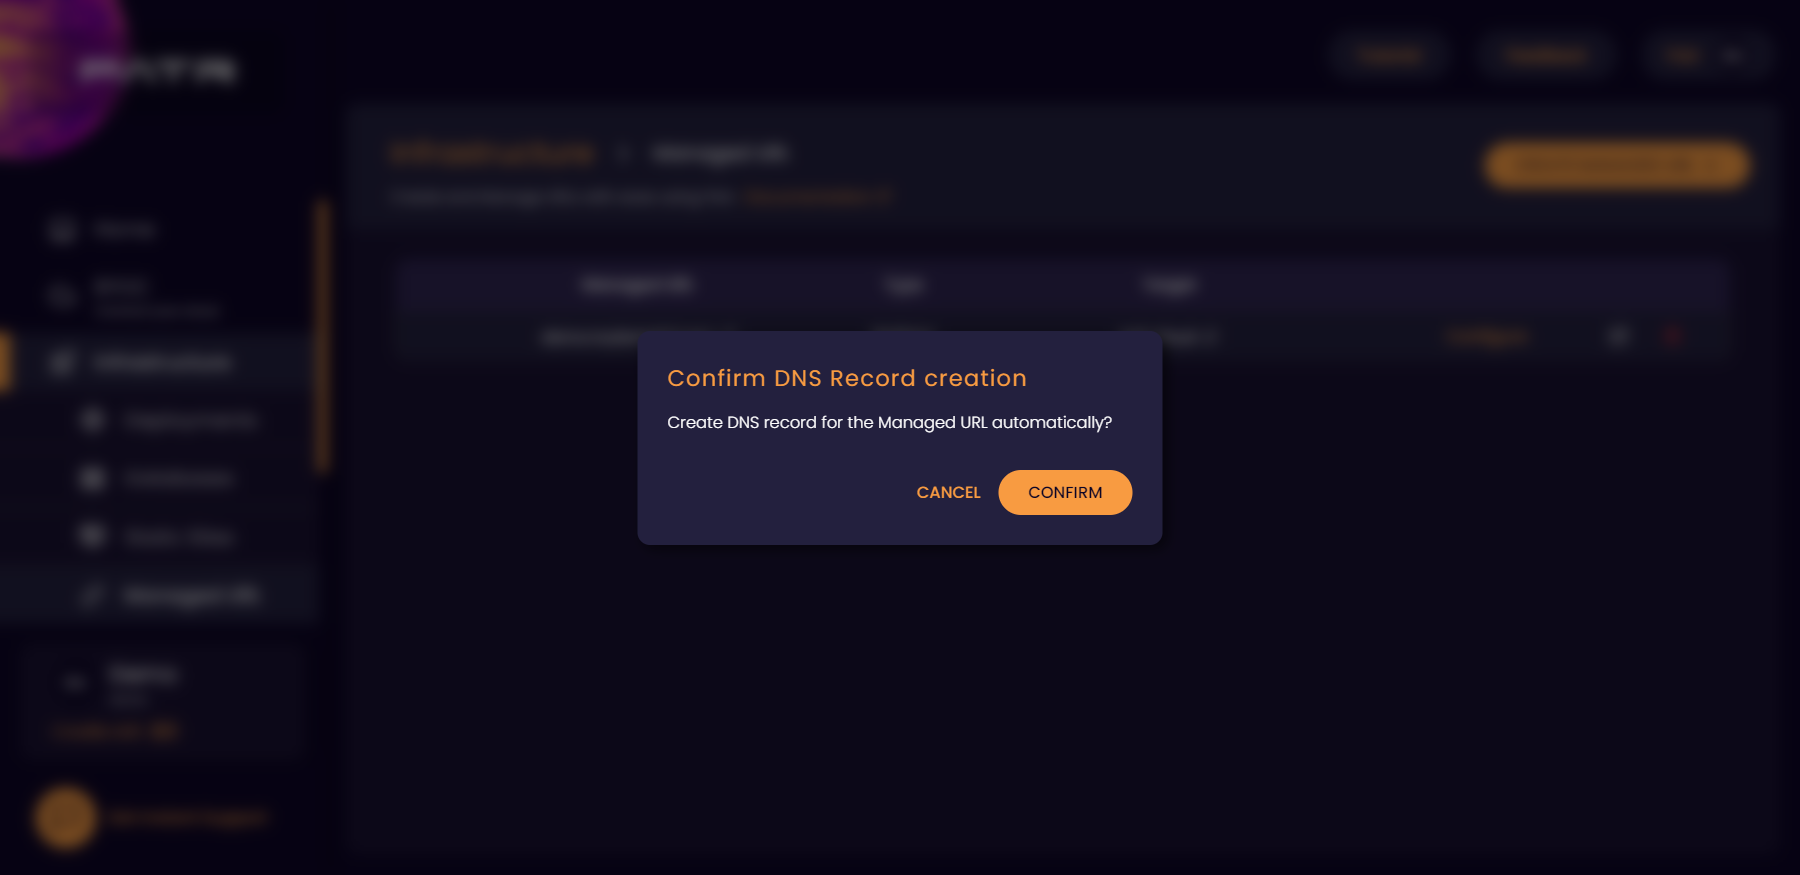
Pointing your DNS for Patr hosted nameservers
If your domain's nameservers are hosted by Patr, you can simply click on the Configure button next to the Managed URL and Patr will automatically create a DNS record for you, and your Managed URL will be running in a few seconds.

Pointing your DNS for external nameservers
If your domain's nameservers are hosted externally, you can click on the Configure button, and you will get instructions on creating the DNS record. Login to your domain registrar (this is usually where you bought the domain from). Select your domain, and add the following DNS record:
| Record Type | Record Name | Record Value | TTL |
|---|---|---|---|
CNAME |
<The subdomain of your Managed URL (or @ for root)> |
ingress.patr.cloud |
Auto (leave at default) |
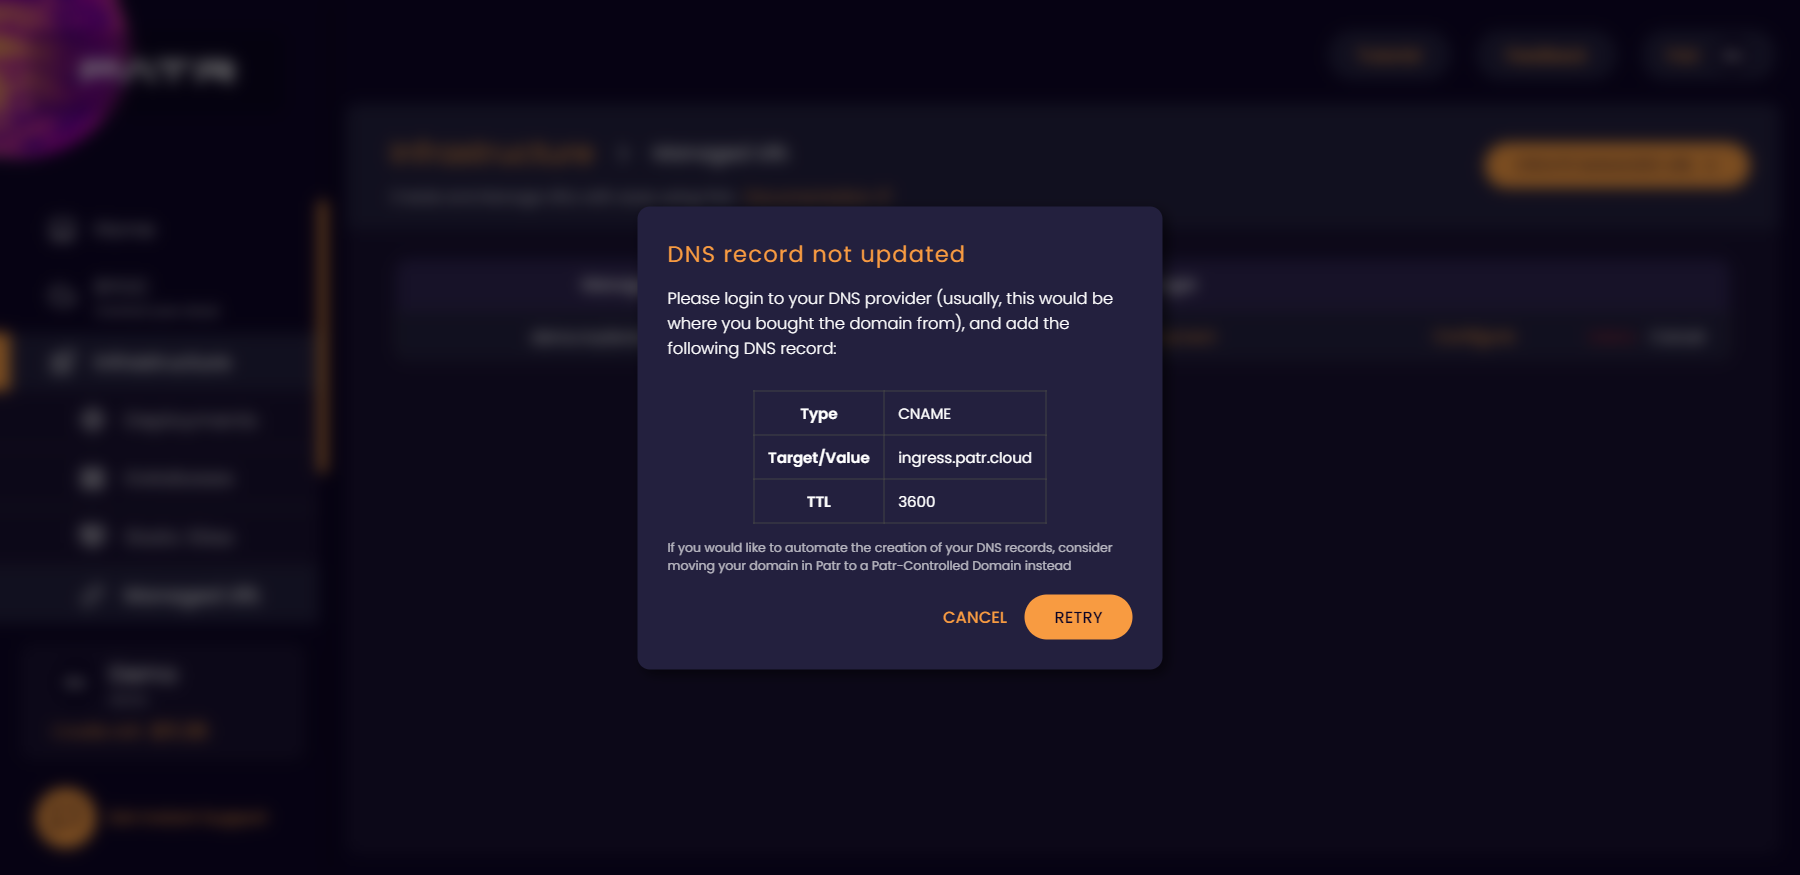
Once the DNS record is added, the Managed URL will become configured within an hour or two.
For instructions on adding DNS records for major domain registrars, see below:
Further Reading
Adding a Domain to Patr
Setting up Secrets on Patr
Managing your DNS on Patr